
Start with a category ابدأ من هنا
Home Guides, Smart home fixes
How to Make Dark Tile Grout Look New Without Retiling
12
Nov
Nov
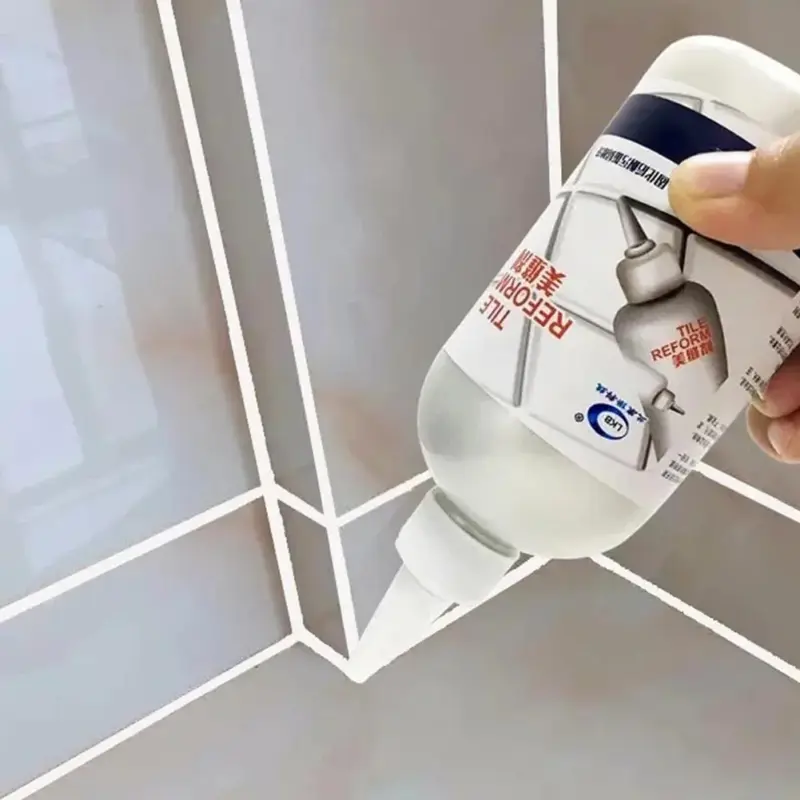
Quick answerYou do not need to break tiles to fix dark, open grout. Brush the joints clean, let them dry fully, then run a tile grout filler along each joint in one steady line and wipe the excess off the tile before it dries. Keep people and water off the area for the time shown on the pack. The floor looks refreshed and the gaps are closed against ants.
In this guide
Why grout darkens and opens up
You mop the floor, it is clean, and it still looks old. The reason is usually the lines between the tiles. Grout is softer and more porous than the tile itself, so it soaks up mop water, cooking oil and dust. Over the years it darkens, cracks and in places drops out completely.
Open joints are more than a look problem. They hold dirt that no mop reaches, and they are a path for ants, especially in kitchens and ground floor flats. Many families in Egypt accept it until they renovate, but a full retile means breaking, dust and a contractor in your home for days. A grout filler fixes the joints without any of that.

From Cairo HubsTile and Floor Grout Filler, 280ml Original price was: 176 EGP.135 EGPCurrent price is: 135 EGP.View productSold out for now
Where to start in the house
Do not start with the whole flat. Pick the area where the difference shows most:
- The kitchen floor, where joints soak up oil and water and ants find their way in
- Around the bathtub and basin, where water sits on the floor every day
- The hallway and living room, the floors guests see first
- The balcony, where dust and rain darken the joints fastest
A tube of 280 ml is enough to get a feel for the work on one area before you move to the next. Many people also refresh the floor before handing back a rented flat or before a family occasion at home.
Prepare the joints
The filler can only hold on a clean, dry joint. Preparation is half the result:
- Sweep and mop the floor the day before so it has time to dry
- Brush along each joint with a small stiff brush to lift dust and grease
- In the kitchen, take extra care with oily joints near the cooker
- Let the floor dry fully. A joint that looks dry on top can still be damp inside
- Open the window for air and plan a time when nobody needs to walk there
What you need: the grout filler, a small stiff brush, a bucket of clean water, two cloths (one damp for wiping, one dry), and an hour where nobody needs that part of the floor. Kneel on a folded towel. Your knees will thank you halfway through the kitchen.
Fill the grout step by step
- Start in the far corner. Work from the corner furthest from the door towards the exit, so you never have to step on fresh joints.
- Run one steady line. Hold the tube at a slight angle and move along the joint in one continuous line instead of short dabs.
- Wipe the excess at once. Use a damp cloth to wipe any filler that landed on the tile surface before it dries.
- Do a small section at a time. Finish a square metre, wipe it, then move on. Large areas dry before you clean them.
- Check the line. Look at the floor from standing height. Fill any spot you missed while the rest is still fresh.
- Let it set. Keep foot traffic and water off the area for the time shown on the pack. Do not mop it until then.
Tip: Fill the kitchen joints at night after the last meal. By the time you need the kitchen in the morning, the area has had hours to rest.
Keep the joints fresh
Once the joints are closed, they are easier to keep clean. Wipe spills in the kitchen straight away instead of leaving oil on the floor, use a mop that is wrung out well rather than soaking wet, and give the bathroom floor a quick dry after showers. The floor will hold its refreshed look much longer.
Bigger gaps around pipes and windows
Grout filler is made for the joints between tiles. Some gaps are a different shape: the space around a pipe under the sink, a crack beside the window or the balcony door, the edge where the floor meets an old door frame. For those, a gap sealing putty works better. You shape it by hand like clay and press it into the gap, and it seals against water and stops ants and insects coming through.

From Cairo HubsWaterproof Gap Sealing Putty Original price was: 98 EGP.75 EGPCurrent price is: 75 EGP.View productSold out for now
For more simple fixes you can do yourself at home, read our full smart home fixes guide. You can also browse Tools and Repairs.
Questions people ask
How do I fix dark tile grout without retiling?
Clean and dry the joints, then fill them with a tile grout filler in one steady line and wipe the excess off the tile before it dries.
Does grout filler work on marble?
Yes. It fills the joints between ceramic, marble and floor tiles.
Can grout filler stop ants?
It closes open gaps between tiles, which seals a common path ants use to get in.
How long before I can walk on the floor?
Keep foot traffic and water off the area for the time shown on the pack so the filler sets.
Does Cairo Hubs deliver across Egypt?
Yes, to every governorate. Delivery is 80 EGP and free on orders over 1,000 EGP.

 Storage & Organization
 Kitchen & Dining
 Mugs & Drinkware
 Travel & Lunch Boxes
 Ramadan
 Cleaning & Laundry
 Bathroom
 Bedroom & Living
 Decor & Lighting
 Office & Study
 Kids & Toys
 Winter Slippers
 Smart Tools
 Tools & Repairs
 Car Accessories
 Health & Beauty
 Sports & Fitness